Month: September 2024

Week 3: Mud Cruise and Chirp Data

Hello Readers! This past week has been awesome learning new things but pretty intense with back-to-back deck operations.

Let’s dive in 🙂

9/16

Today, I practiced my CTD termination! Since we have yet to make a new CTD termination but instead have made a new trawl winch termination, I have been using scrap cable from the CTD to practice with.

So, what is a cable termination? A cable termination is when you are connecting two different cables together so that power can run through the cable to give and receive signal to whatever device you want connected! I have been practicing with a pigtail cable (cable that attaches to the CTD with no end, just cable that has been cut). In order to make a cable termination you must cut through the outer layers of both cables. The CTD cable is made out of two metal layers, an outer and inner layer. I will have to cut through both to reach the inner wire that sends and receives signal.

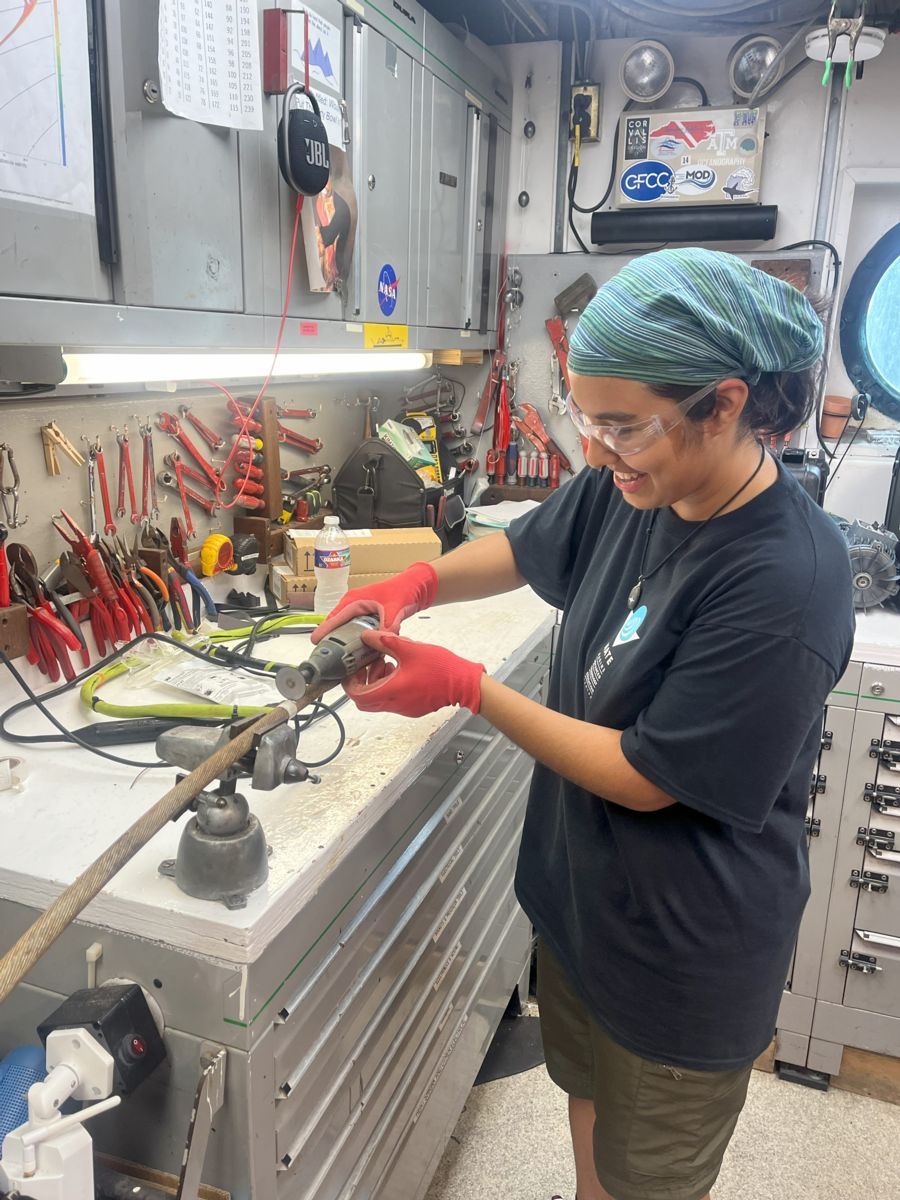
I first have to cut through the CTD outer layer using a Dremel and make sure it is an even cut so that when I cut the inner layer, it is even for termination. I then cut the inner layer and leave two metal strands alone so that the positive or negative wire from the pigtail cable will be later attached. I then move onto another layer which is a silicone shield, to protect the inner wires from touching and conducting electricity to the outer layer that also sends and receives signal. I strip the silicone shield by using a wire stripper and delicately remove it to reveal the 3 strands that can go to the positive or negative wire. The trickiest part is having to individually strip these three very thin wires without cutting through them! If I do make that mistake, I have to go down further into the cable to try again and if that happens too many times, I might have to start over from the start!! After I carefully strip each wire and sand wire to expose the pretty pink wire, it is time to move onto the pigtail cable!

Revealing the inner wires of the pigtail cable is relatively easier and the same process as stripping the three thin wires. I use a wire stripper to cut through the thick black pigtail cable to reveal the two inner wires and some paper to keep the cable in its circular shape. I use the wire stripper again to strip down these somewhat thin wires and sand them down to reveal the pink wires. I sand down the wires so that the next process is a bit easier for me.

Once everything has been stripped and sanded down, it is time to put the two cables together via soldering! I prepare the soldering material and twist the matching wires together so that soldering is easier. To find out which wires from the CTD cable match the wires from the pigtail cable, you do a continuity test using a multimeter to find out which wire is positive and negative. Once that is figured out, you can then twist the wires together and start soldering!

Before this internship, I was not too experienced with soldering since I did it a few times for a class. However, now that I have practiced a bunch of terminations using solder, I got the hang of it!

Once I soldered the wires together, making sure to cover most of the exposed wire, I then cover it with heat shrink to really secure the new termination I made. Then there are two ways to go after this step to fully secure the termination. There is a resin/silicone inline splice kit method or a hot glue method. Both choices vary on the context of making a termination, whether that be time constraint or quality of termination. The hot glue method is just as good as the resin inline splice method and dries quicker to use the termination ASAP. The resin inline splice method, depending on the manual, takes 24 hours to set but is very sturdy and has a nice mold it can set in. I went ahead and did the hot glue method since I am only practicing and would be very fast to set.

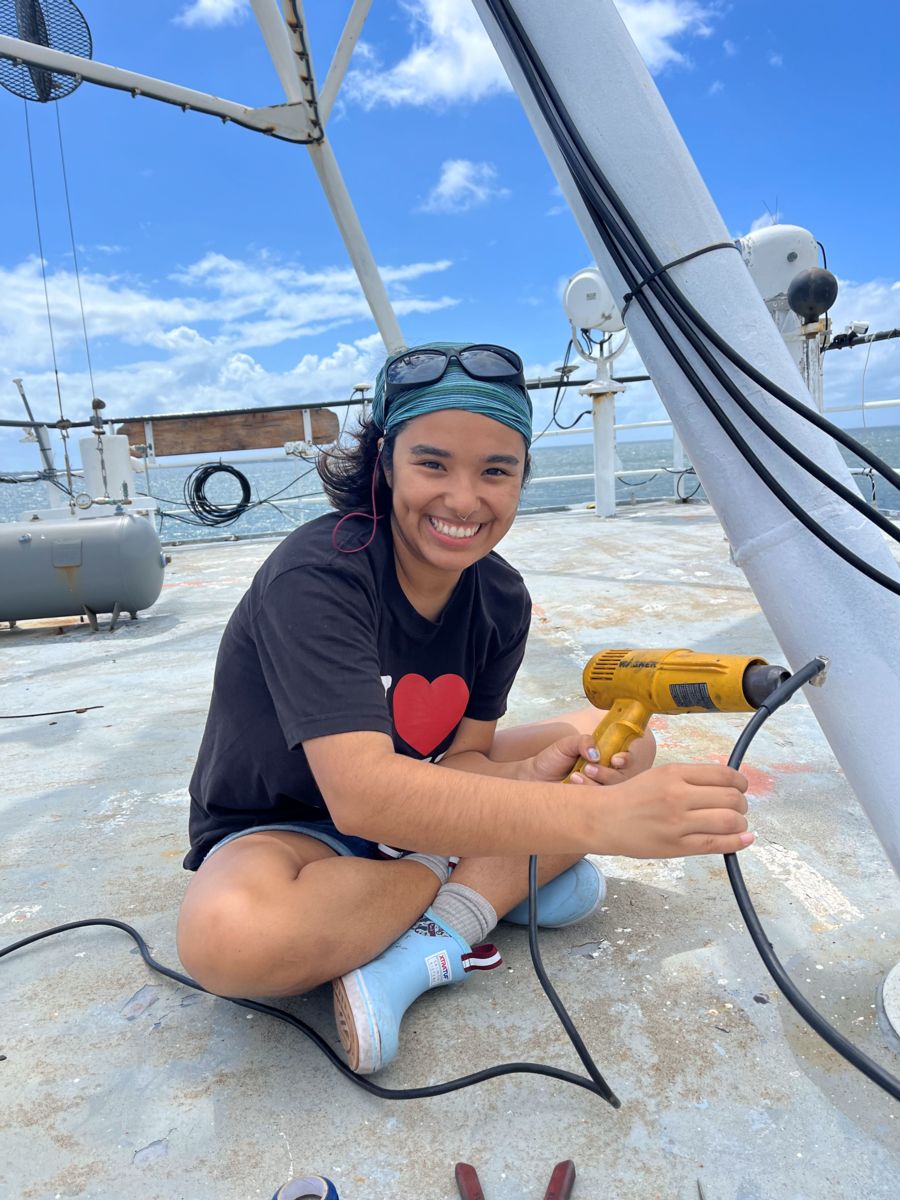
I started hot gluing the new soldered wires together to form a single cable, the same diameter as the CTD winch cable, and made sure it was nice and even. To really secure the hot glue termination, you should hot glue a few inches past the cables so that the hot glue has something to really hold onto. Once that is done, we can now use a bigger heat shrink to finalize and secure the new termination once more!
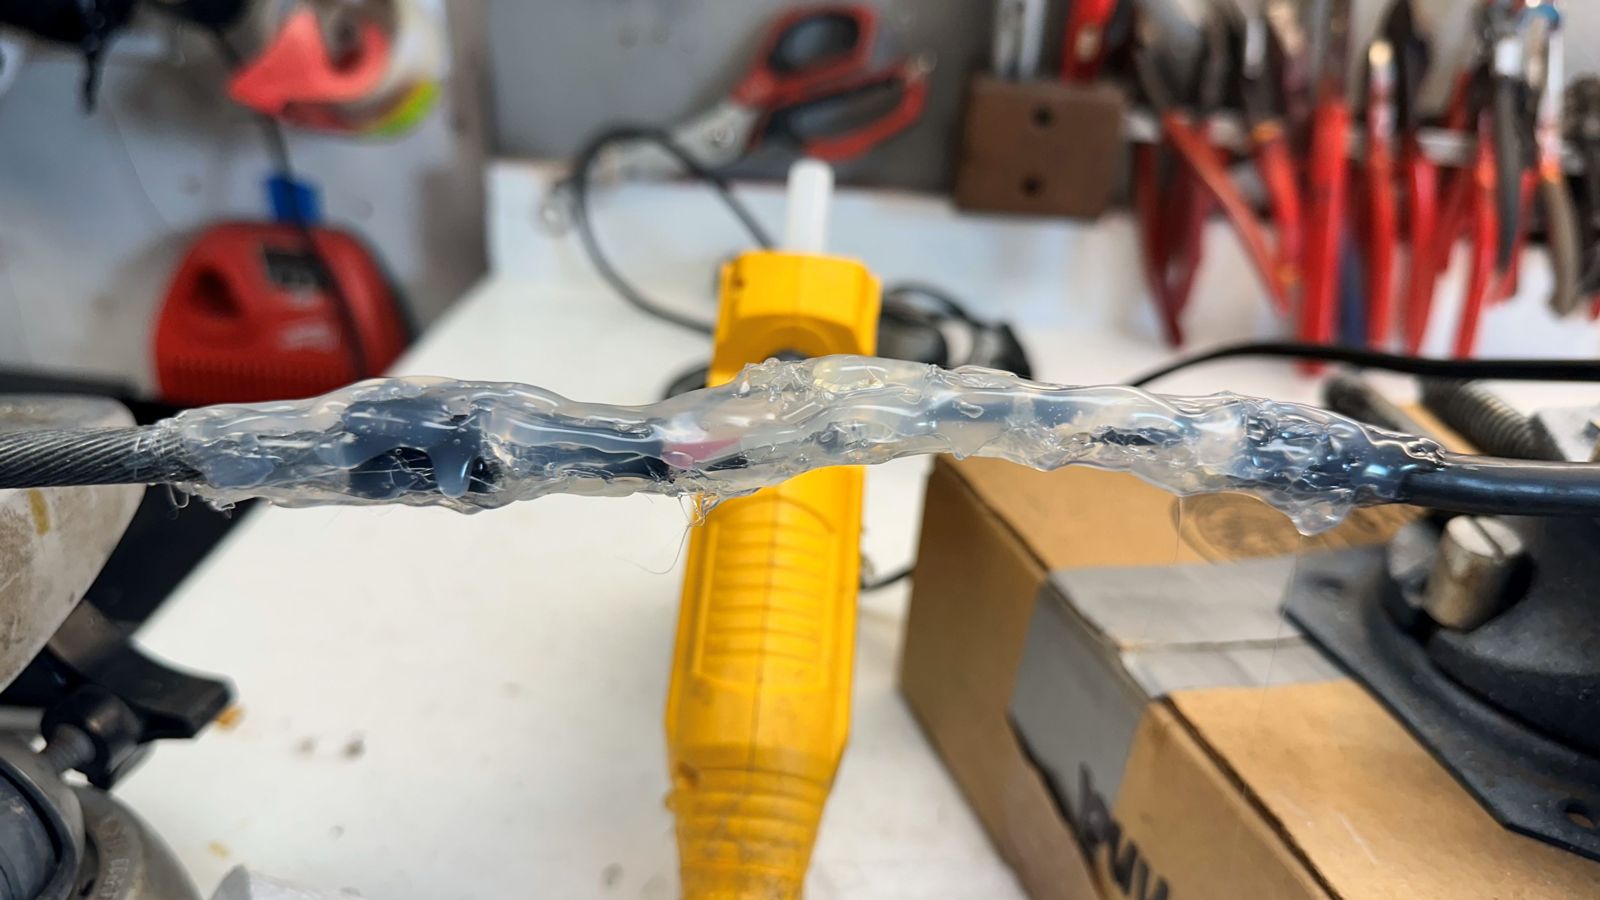
I use a bigger heat shrink so that the new hot glue can be covered, and that the diameter of the cable is even across the entire termination. This step usually takes a while if I use too big of a heat shrink but, in the end, they all shrink down to a good size and secure the brand-new cable termination I just finished!

9/17

Today, I learned how to process some CTD data to help scientists calibrate their data. To process CTD data, we use a software called Seasave that automatically gathers the data and averages values depending on the parameter. I first had to process all the CTD data which was one file output and then, to help out a scientist who wanted average sound velocity at every meter, I went ahead and processed the output file. To get sound velocity averaged at every meter, I had to bin the data by one (which accounts for every meter), and then press the process button to get the bin file! I then give all the processed and binned files to the scientist who needs it, and his data will be calibrated soon!

This current cruise is about to wrap up as we head to shore now, so in preparation, we turn off the SCS system, flow thru system, ADCP system, and ship track system once we reach Gulfport Bay. Once these systems are shut down, they will usually be saved in their respective folders within the ships network. That means the marine tech has to gather all the individual data from the systems and put them into folders labeled ADCP or SCS that then get added to one major folder with all the cruise data! This single folder with all the science data gathered from the entire cruise is then transferred to a USB which is then given to the Chief Scientist of the cruise!

It is very fun to know where cruise data comes from, how it is manipulated (sometimes), and see it all come together to be given to the Chief Scientist. I have been on the other side of the science where I receive that data and have to do some post processing to get the data I want and need. In my head, it all makes sense where the data comes from, how its saved, why it has to be saved in certain formats, so we the scientists can go crazy with the data!

Later that day when we had some down time, we went over the name of hand tools which I am not too familiar with. The only hand tools I know are a Phillips flat head, screwdriver, and a hammer. Outside of that, everything I learned and mentioned on this blog has been learned on this boat!

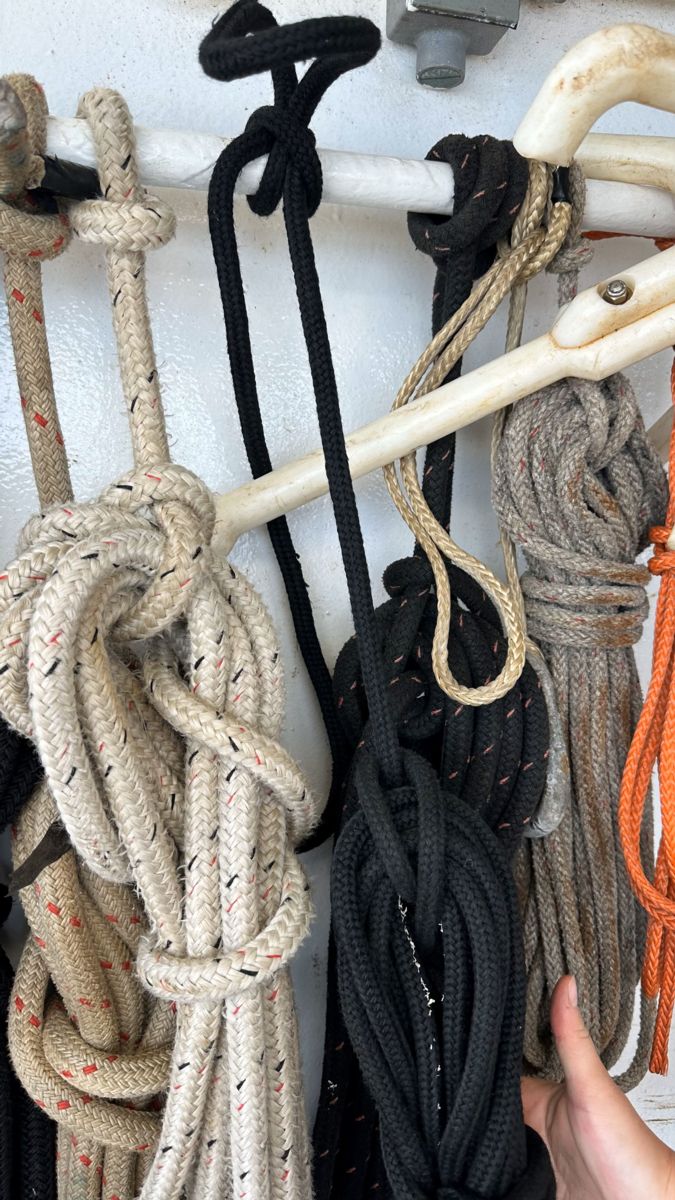
Then to end the day with an activity, I was introduced to hollow braid and how to splice with it! This type of rope is synthetic but braided very meticulously so that when you push against it, it opens up, but if you pull it, it tightens. To splice this rope, you need to use a tool called a fid. The fid looks like a knitting needle with a pointy end on one side and an opening on the other. The opening is for the hollow braid rope to go into to be able to tuck the rope into itself. Grace taught me a trick to cut the end of the rope at an angle and tape it off with electrical tape to be able to effectively insert it into the opening. To really secure it, she says to wrap the area around the fid where the rope is inserted into with more tape. Now that it is taped up, it is ready to splice!

To splice, you need to have enough line to either make an eye splice or an end splice. Usually, the amount of length needed to make a secure length is around ten inches. When beginning a splice, you put the pointy end of the fid into the rope (with enough space) and start pushing the rope into the hollow braid. It will naturally start to open up and go further into the fid. Once you are at or past ten inches then you take the fid out and then take the rope from the fid and pull the rope from both ends. This will make a seamless splice and keep most of the strength of the rope!

9/18 & 9/19

Today we reached shore, and I learned how to shut off the flow thru system! Yesterday I learned how to turn off the systems but now I have to fully shut the flow thru system down so that I can learn how to deep clean it! Lots of algae accumulates in the transmissometer and the TSG (temperature, salinity, and conductivity) so marine techs have to maintain these sensors and clean them every other month!

Cleaning the transmissometer, we use grit soap to clean it first, and then use diluted bleach to wash the grit soap and then rinse it with water to finish it off. The TSG is more delicate and can be cleaned with grit soap but cannot be cleaned with bleach! Then you must rinse the TSG with water and use a scrub to get the grime off. Once everything is clean, you put the sensors back together (which is hard on this ship) and boom, the flow thru system is cleaned!

Next on cleaning is the CTD sensors and Niskin bottles! This CTD cleaning has to happen after every cruise is complete so that the sensors are ready for the following cruise. The products used to clean the CTD are diluted Triton X (a surfactant), diluted bleach, and DI water in that order! I used a big syringe with a tube connected into the CTD sensor in order to pump the chemicals back and forth to get all the accumulated algae and saltwater out. Once I am done cleaning, I leave a bit of DI water in the CTD so that the sensors stay wet and maintain function.

Once that was done, I rinsed the entire rosette with freshwater and made sure to rinse the inside of all the Niskin bottles so that they were all nice and clean. I left the bottles open for them to air dry and once they fully dried, I closed them and finished cleaning the CTD rosette!

9/20

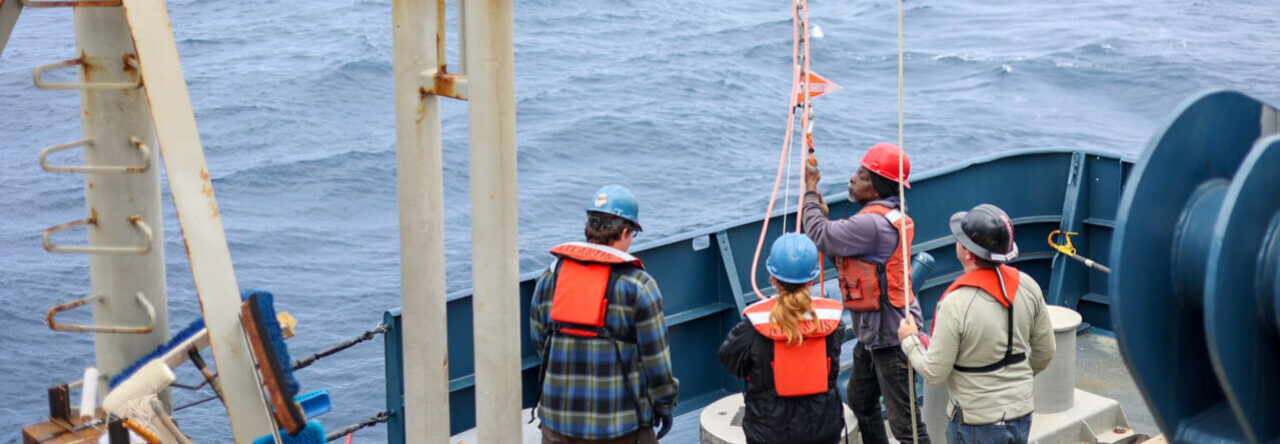
Now that the first cruise is done, the ship crew has to start preparing for the next one! Today we are mobilizing for the next cruise and that means getting our shift schedules in order. Me and Grace agreed that I should have the morning shift from 4am to 4pm, leaving me to be the sole marine technician for around four hours!! This means I have to be in charge of coring operations and CTD casts before Grace is even awake! This made me a bit nervous at first since I have not done a coring cruise before but the mate and deckhand on shift will help me through it all!

Since most of today was scientists getting their equipment on board, Grace went ahead and introduced the Chirp echosounder to me. The Chirp system on board has two settings; 3.5kHz and 12kHz. The 3.5 kHz is used to make a 2D profile of the seafloor and also display subfloor layers, which can tell scientists what type of rock it is. This, however, comes at a cost on the ship since the Chirp sends loud signals and at a fast rhythm depending on the depth, which might disturb sleep for people. The 12kHz on the other hand is much quieter and can give a profile of the seafloor but cannot display any subfloor layering. So, scientists may want to use one setting over the other depending on their needs. On this mud cruise, the PI wants to use the 3.5kHz to create a seafloor profile in order to see what type of rock is beneath the seafloor.

9/21

This morning was my first shift alone as the marine technician! It was a really rough start but, in the end, everything worked out how it was supposed to! Coring operations with the Mega core require someone to control the A-frame, the .680 winch, and the ship. The way things worked out this morning was that the deckhand controlled the A-frame, I controlled the winch, and the mate controlled the boat (to keep it on station). I was not expecting to control the winch, let alone do it on my first coring operation, but I did it anyway and learned on the spot.

When it comes to controlling the .680 winch, you have to keep in mind how the A-frame moves. If the A-frame moves out, the package the winch is connected to will start lifting up because the winch cable is getting shorter. If the A-frame moves in, the package will start to move down as the winch cable is getting longer.

With this operation, we have to lift up the Mega core above the ground so that the co-PI can switch a pin from one hole to another that allows the Mega core to capture mud samples when it hits the seafloor.

Then we can fully A-frame out and that will lift the Mega core up and that is when the winch operator must pay out (give more line) so that it can smoothly go horizontally outwards. Once the A-frame is fully extended out, the winch operator can begin to fully pay out at a certain speed before sending the Mega core down automatically.

I was the one controlling the winch during the first coring operation and that was a bit rough. I could not quite grasp the idea of the A-frame moving and influencing the winch cable at first so when it came to lifting the Mega core before deploying it and recovering it, I was scared that I was going to squish someone’s toes! Despite my nervousness, I was able to safely deploy it and get it back on deck, and even got 11 cores out of 12! This was important since the twelfth core had not been working for months and 11 cores means all samples were collected as much they could!

9/23

This morning was busy with coring operations back-to-back. The first coring operation was a pleasant success as twelfth core on the Mega core somehow worked (which had not worked since early this year) and almost got all coring samples! The science team was so excited to see that specific core get something and made me happier that all the deck operations and winch operations were worth it even for this small moment.

Since the science party wants to start coring operations at 4am when my shift starts, that means I do half of the coring and CTD operations on deck. Sometimes I go ahead and do them all because I really want to experience the true work life of the sole marine technician on board. I, of course, am never alone as Grace always has my back and the crew are always there to support me.

Since joining this ship, I have gotten a bit shy around the new science party that joins, and I was really curious as to what this science party were looking. All I knew before they joined is that they are sampling in the Deep-Water Horizon oil spill region. I got the courage to ask them about their science project and they were very kind and open to explaining the whole reason why! The main science group that processes the mud core samples is looking at the biological samples from this sediment, whether it be microscopic or macroscopic, and seeing how the Deep-Water Horizon oil spill has impacted the species in the area. I saw that they were slicing the cores in specific lengths and I asked about that and the Chief Scientist/PI of the lab explained that when science groups first did coring samples of this region, they all sliced the cores at different lengths, and they are attempting to match each study with different lengths. That way they can compare the samples with all the different studies in a somewhat standardized way! I asked another group what they are doing here, and they want to use water samples to filter for eDNA and POM (particulate organic matter).

We ended all deck operations successfully and headed back to shore a day early since a new tropical storm (turned into Hurricane Helene) was forming and creating high wave height by tomorrow, so we want to avoid it as much as possible.
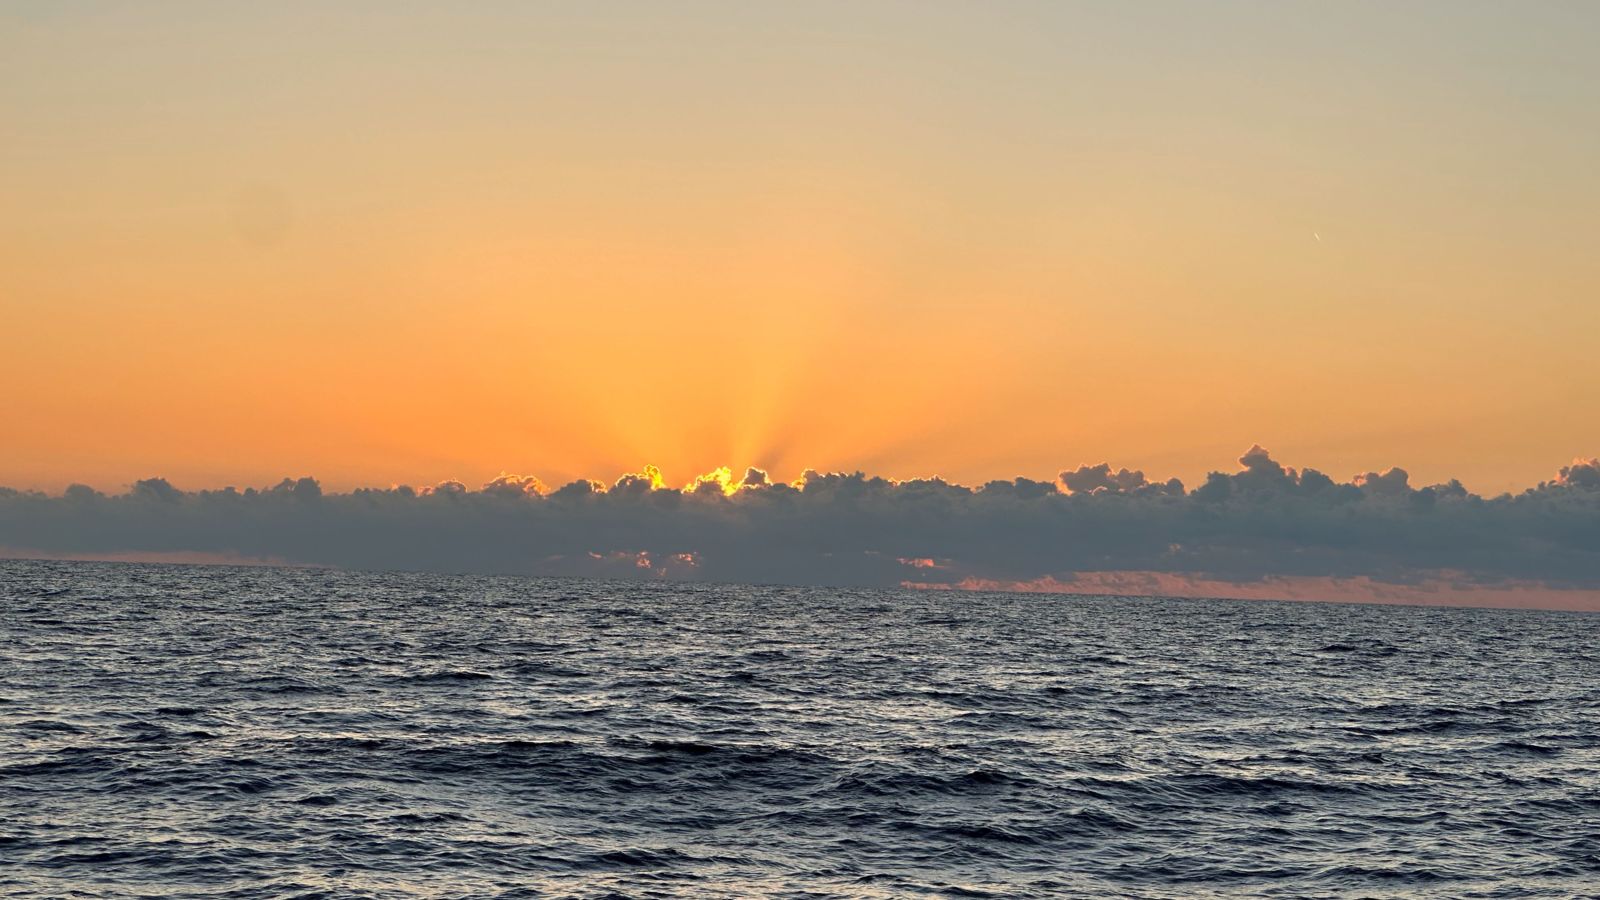
This mud cruise was super hard yet super fun! See you all next week!

Kristine


Week 2: Adventures on the Point Sur

Hello Readers! So far on this current cruise, everything has gone great and as I am writing this, we are heading back to port a day early!

But I have to catch you all up to what I have been doing this past week!

My fifth day during this internship was learning quite a few different subjects. I learned more about COAX connections, rope tying, and figuring out a plan to troubleshoot the transmissometer. We did this during transect lines as the transducer needed data, which meant free range on our activities. The first part of the morning we tested the primary antennas and looked at the COAX connections to make sure nothing was corroded. Our tests of connecting and disconnecting cables helped pinpoint which antenna was the culprit and it turned out the side antenna (since there are 3 in a triangle formation) was not working properly. We made a rough plan of what to do the following few days since a scientist on board needs continuous GPS data and had to hold off on that.

After this event, I went over my rope tying knots, solidified my definition of hitches, and learned a cleat hitch! It will be pretty handy for me when I work more out on the deck when it comes to our next research cruise, a mud cruise as they call it! Basically, we will be taking core samples from the bottom of the seafloor and will be using my cleat hitch skills and tag line skills to help maneuver the coring device, MC-800 Multi-corer Deep Ocean Sediment Sampler, as steady as possible.

We also troubleshooted the transmissometer and had to wait and see if it was fixed in the following few days because we would be arriving to Pensacola port to avoid the wrath of Hurricane Francine! The seas were beginning to get pretty rough, so we made it out of the Gulf of Mexico right on time!

The following day, Grace showed me how to shut down all sampling systems since we would be arriving at port soon and got the okay from the PI. She explained that we have to shut down the systems to avoid sediment from clogging the flow-thru system (since water gets shallow) and the ADCP data at port is irrelevant to the science party. While she showed me how to shut down the systems, she also explained to me what types of data streams through specific software like Seasave and SCS. That also means we have to disassemble and secure the huge transducer pole before going into port. We did just that with a bit of a hiccup, but everything was secure before we moved up into port.

The rest of the day was spent troubleshooting minor issues and once our shift was finished, we hit the town and got to know downtown Pensacola!

On our seventh day, I practiced my rope knots and seemed to forget a few of them. Grace made me do them all until I had them down and that helped me a lot to really drill it into my brain.

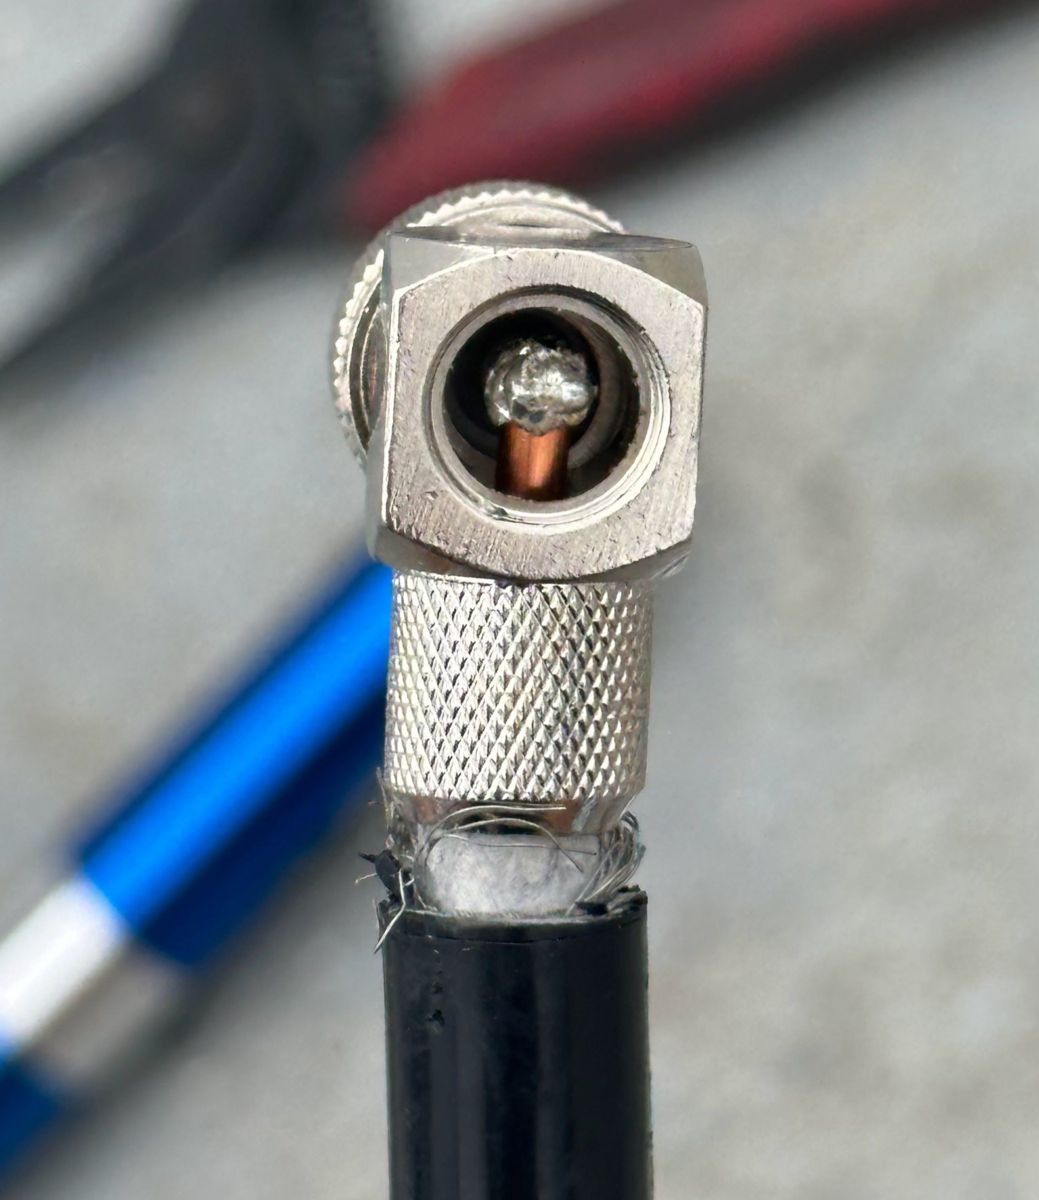
Since we were at port and there was clear weather out for a bit, we decided that it would be a good day to create a new cable termination for the suspected antenna. We cut into the antenna and noticed that the inside was completely corroded so we kept cutting until everything looked good and started the termination from there. We used an elbow COAX to start the termination and had to figure out how to solder the very middle inner piece to the COAX connection. After 2 attempts, we figured out how to solder the cable and COAX together and went downstairs to see if the connection works. We saw that the connection worked but that the heading issue was not fixed, and the other antenna was starting to have an issue, so we replaced it with a backup antenna, which seemed to fix the position issues. As for the heading issues, we contacted the team responsible for the software and waited for a response.

Then once our shift ended, we headed into downtown Pensacola one last night before leaving the following morning!

On my eighth day, we started things off slow since we had to secure the transducer pole back on deck before going out to our first station. We couldn’t start our sampling systems until we were out of the bay to avoid irrelevant data and clogging our flow-thru.

In the meantime, we got a response from the team responsible for the GPS software and saw that heading was back up and working!! The heading issue was happening the entire time I have been on the Pt. Sur so having this issue resolved after many troubleshooting attempts was super satisfying and a check off our long to due list.

During the downtime between leaving the bay and reaching our first station, I learned how to start the sampling systems for the ADCP, SCS, flow-thru, and Wi-Fi. There is a bit of a learning curve to understand how to turn on the ADCP and SCS system but with Grace’s help I was able to do it!

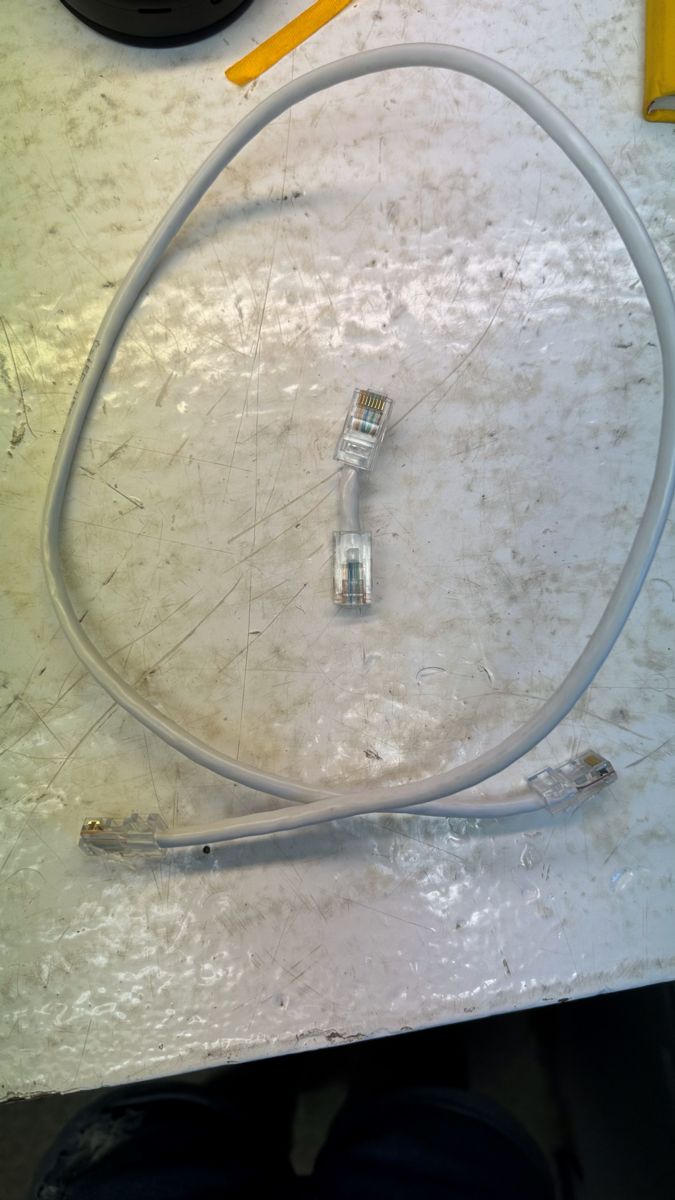
Once that was done, I learned how to make ethernet cables which was super fun to me because I have always seen and used them but never knew you could make some yourself! Grace taught me how to make them and how to test the connectivity and realized just how fun it is. I made a few throughout the day with some down time and slowly got better at it!

I also learned how to splice rope, specifically manila rope! Manila is made out of hemp and is pretty rough to work with but if rope falls off the boat, its biodegradable. However, since it is biodegradable, if it gets saltwater on it, it will degrade much faster compared to other materials of rope. The different splicing techniques I learned are back splice, end to end splice, and eye splice. I also learned how to do whipping knots to secure the base and end of my ropes, to make sure its super secure.

On my ninth day, we continued troubleshooting the transmissometer by replacing the ports with the transmissometer and PAR sensor. We originally were using a y-cable so that the fluorometer and transmissometer were sharing a single port but, to rule out any issues in case the pins on the CTD were the issue, I switched the ports with the PAR sensor. This meant that I used a y-cable to share the PAR sensor and transmissometer on the PAR port, meaning the fluorometer will get its own cable and port.

After I was done switching cables, Grace taught me how to splice rope with synthetic material! Synthetic rope doesn’t degrade as easily as organic material, but it frays easily. Working with this type of rope was hard to tuck in on itself but I was eventually able to complete the splice knots.

Grace also taught me a new special knot called a shrimpers bag knot! Basically, when you make an overhand knot around a bag and make continuous repetitive knots that make a long-braided line, you yank it to catch whatever you want (called shrimpers bag for a reason). It was relatively easy to tie and convenient for various reasons.

Later in the afternoon, Grace requested two ethernet cables from me since she has had issues connecting her computer system to the ADCP monitor, so I went to work! When it comes to troubleshooting, Grace likes to replace cables or create new cable terminations for them first before moving onto the deck box or device and then eventually the software, that way it’s easier and less complex to figure out the issue. I quickly made her two ethernet cables and replaced them on the ADCP deck box and she tried testing it, but nothing changed. I tested the ethernet cables for connectivity earlier and they were working perfectly fine, so we know it is not the cable that is the issue. She thinks it might be a software issue, but it isn’t too much of an problem at the moment.

The following morning, we continued to troubleshoot the transmissometer and decided that we would switch the instrument with another one we had on previously just to see what would happen. We were aware that the previous transmissometer was giving just as bad data as the current one, but we thought that the cable and port switch might do the trick for the previous one. I went ahead and switched the transmissometers and calibrated it and made a new configuration file for it! I did this all on my own and was surprised by myself at how quickly I grasped things on the software side of the CTD instruments!

Later that afternoon, Grace instructed me to take a look at the backup GPSs (BX982) and see how the connections are looking like. I went up above the wheelhouse to take a look at the cables and saw that there was some corrosion beginning to form on the inside of the COAX cables and a lot of corrosion on the outside of the antenna. To troubleshoot, Grace said I should just clean the inside of the COAX cable and the outside of antenna with electronic cleaning liquid. After cleaning the cables and antenna, we tested to see if the backup GPSs were giving heading and position now but there were still errors. The next best thing would be to make new COAX cable terminations for the backup antennas, and we waited until after lunch to do so!

After lunch, Grace gave me the opportunity to do the cable stripping, termination, and soldering all on my own, which I was a bit hesitant to take on but did so anyway. How else am I supposed to learn if I don’t make mistakes and improve from there? I got all the supplies I needed to make new COAX terminations and went up to fix the GPSs. I went straight to stripping wire and found a lot of corrosion inside both of the cables. Later, Grace joined me and looked inside the old COAX connection I had already cut off and she found huge amounts of corrosion inside the connection which was our culprit in our errors. Once I was done stripping both cables, I went to solder the COAX elbow connection and cable connection conductor together, which in all honesty, was the most intimidating part of it all and took me a while so I can avoid big mistakes. I didn’t solder a good connection at first but after a few tries I eventually got the two pieces soldered together and used heat shrink to really secure the cable and COAX cable together. We finally put the cable back into the antenna and tested to see if it was working, and it was! The best part is that after a few hours, for the GPSs to reconfigure on their own, they finally got position and heading on our feed! YAY! We fixed all the GPSs onboard right on time before our upcoming mud cruise!

It was another intense but successful week of troubleshooting, learning, and practicing patience. See you all next week!

Kristine

Week 1: Getting to know the Pt. Sur

Hello Readers!

As I write, it is currently day 6 into my MATE internship working with my mentor, the lovely Grace Fulton on the Pt. Sur, and let me tell you… I have been learning A LOT!

On my first day aboard the Pt. Sur, I had just flown in from Seattle that evening and met some of the crew and had dinner with Grace before heading to bed early. We went to bed early since we would begin mobilizing and working at 6 AM sharp the next day! We woke up nice and early to bring in the CTD, rollers, and tugger winch block, using the J-frame crane to bring them onto the deck. The CTD just came back from getting repaired, so Grace craned that and the tugger winch block onto the deck. I carried the rollers aboard, and man were they heavy! The rollers and the tugger winch block will be used for the DEEPEND project which uses a MOCNESS net.

The project uses a MOCNESS (Multiple Opening and Closing Net Environmental Sensing System) net that carries long big nets that are triggered on the boat so the net can be released any depth and time to capture whatever biology is in the water! This net takes up the entire deck and takes a team to deploy it and bring it back up.

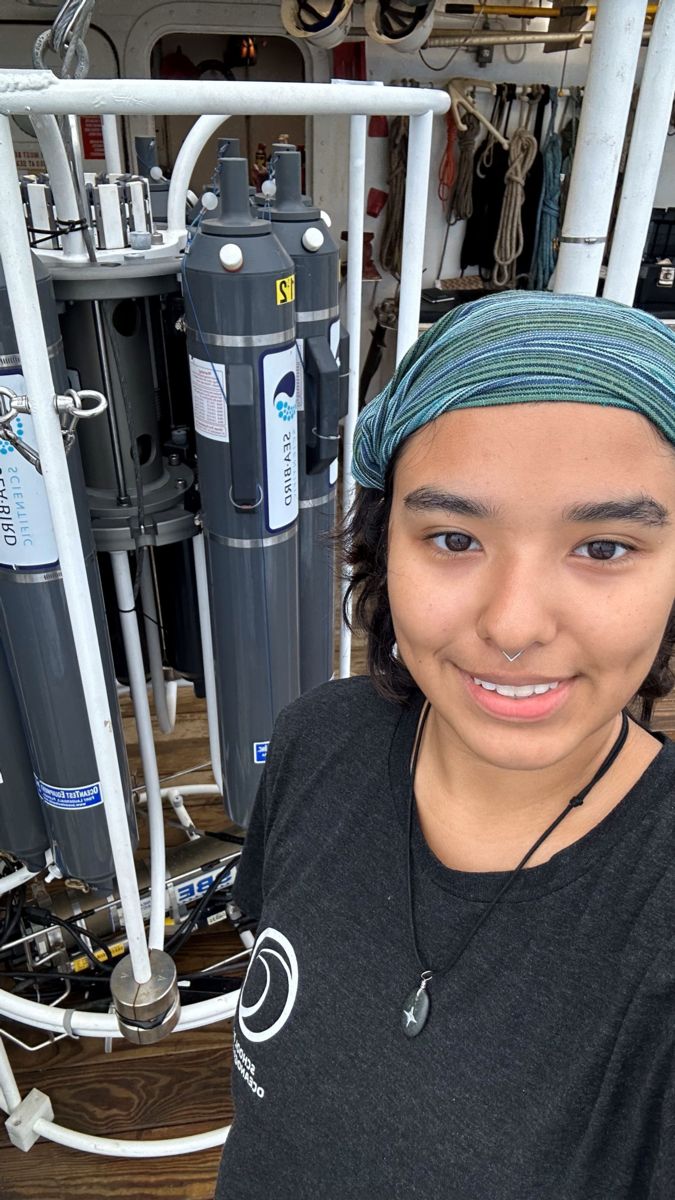
I spent the rest of the day learning so many cool things! Me and Grace set up the CTD with various sensors, including me learning how to correctly identify ports and connect cables to the CTD so that the sensors can use the conductivity, salinity, and temperature parameters to work!

I was able to learn how to create a cable termination needed for the MOCNESS net winch to work and that included me learning how to use a rotary cutting machine to cut through many layers of metal cable. Cutting through that cable was hard since it was my first time and it honestly intimidated me but after many mistakes and redoing it, I got the hang of it. I then had to solder the winch cable and the cable a co-PI wanted to connect to the MOCNESS net and then used heat shrink to protect the new connection. To finish it off, I learned how to make a silicone mold of the terminator to fully protect the entire process I spent drilling off wire, soldering, and heat shrinking. Once that was nice and dry, we tested the connection, and it works perfectly!

On my second day we woke for our 6am-6pm shift and noticed that the flow-thru system was having trouble connecting to the computer in the technician lab, so we went to check out the flow-thru system and found that the power supply for the system was disconnected so there was zero power going to it. We plugged it back in and the problem resolved, PHEW!

Soon after, we went out on the deck to put the transducer pole in the water, and I went to unchain the pole from the side of the boat when my helmet fell off and it went under the boat. I learned my lesson and now tighten my helmet as hard as I can.

When we left the port, we began to have issues with the backup GPS system used to help with navigation and other instruments that needed it. The main issue with the GPS is the heading, what direction the front of the boat is pointing towards. We troubleshooted by resetting the system, but it did not work, so we started investigating the software and found that the GPS was on but not able to recognize satellites and therefore where forward was. We went ahead and emailed a person who created the software for the GPS and found that the issue could be with the cable, connection, or antenna. Troubleshooting for this issue has been hard, however the solution as of right now is using the gyrocompass which only gives heading direction!

I also got to control different frames on deck! I got to use the A-frame which helps take out heavy equipment/instruments off the stern and I got to use it every time the MOCNESS net needs to deploy. Along with that, I got to use the J-frame which helps get the CTD on and off the starboard side of the ship! It’s simpler than I thought although it’s absolutely heavy and huge and I’m so happy I get the opportunity to handle these types of machinery!

On my third day on the ship, I got to learn how to tie the basic knots and a bunch of other useful knots I will be using a lot more on the next cruise. I finally solidified my bowline knot, and learned how to do different bowlines, different hitches, and a few knots! I have been practicing  my knots every day and seem to get better at them the more I practice.

I also learned how to read and make hand signal while a crane is operating. For example, if I want the person operating the crane to move the crane up, I point my index finger up and make a circle motion to signal up. Along with the signals themselves, I have also learned to associate the terms with them like knuckling and boom up which I have a bit of trouble remembering, but with enough practice I’ll be set.

I also got my practice with Seasave, the software used for running, saving, and manipulating the data for the CTD. It was a bit daunting for me but having Grace guide me in every step of the way while I learned was super helpful and I can now say I am familiar and able to conduct a CTD cast on my own! I now know how to rerun previous CTD casts, for example, to note if our transmissometer is still malfunctioning and see which data is useful and which isn’t.

After that, things started to slow down as the boat was drifting since we deployed the MOCNESS net and that’s when I got the rundown of the Wi-Fi. The Wi-Fi on this ship is using Starlink and has a limit of 1TB every month. They had just upgraded the Wi-Fi just this year and is capable of fast Wi-Fi. This means that marine technicians have to keep a close eye on the Wi-Fi as they are in charge of it, at least on this research vessel, and have to make sure not to exceed the monthly internet limit. This means me and Grace have to keep watch on our daily limit and warn individual users not to use too much if we do start to notice an excess use of the internet.

On my fourth day, things started off pretty slow! Grace decided that to continue troubleshooting our transmissometer issue, I should replace the entire y-cable it is connected to that also connects to the fluorometer and that then runs to the CTD. I did just that and waited until a CTD cast was needed to test the cable out and the transmissometer was still malfunctioning. We will try to switch the y-cable inputs and see if it is the cable malfunctioning or if it truly is the transmissometer. If that doesn’t work then Grace thinks there is an issue with the pins on the transmissometer, the CTD pins, or the CTD itself. Not sure yet how we will test that, but it would be very rewarding to figure out once and for all what has been causing this issue for the entire cruise!

I learned a couple new knots, a sheet bend and a round turn and two-half hitches! The sheet bend was simple to learn but hard to remember. The round turn and two-half hitches knot were a bit hard for me to learn and harder to remember but after practicing a bunch, I think I can remember it! Grace has been helping me out with memorizing the knot names, tying knots, and their uses by quizzing me randomly throughout the day. I find this immensely helpful as daily practice will solidify my memorization and as she explained, if we are in some sort of emergency, I need to know how to tie certain knots to secure something or attach my line to another object.

Finally, I ended my shift by working the A-frame and J-frame all on my own! This means I got to recover the MOCNESS net using the A-frame all on my own. In my opinion, it was a bit bumpy using the A-frame on my own without guidance, but the recovery went super well! I also got to control the J-frame which moves the CTD in and out of the starboard deck. I got to deploy it using the J-frame which I have practiced a bunch the past few casts, and I got to recover it by grabbing ahold of the entire rosette and everything went smoothly! I’m proud of myself that I can be capable of so much equipment and instruments, and seeing as I have more to learn, I am so excited to see what else I am capable of!

I can’t wait to tell you all what else I will learn! Stay tuned and see you next week!

Kristine


Powered by WordPress & Theme by Anders Norén